meta data for this page
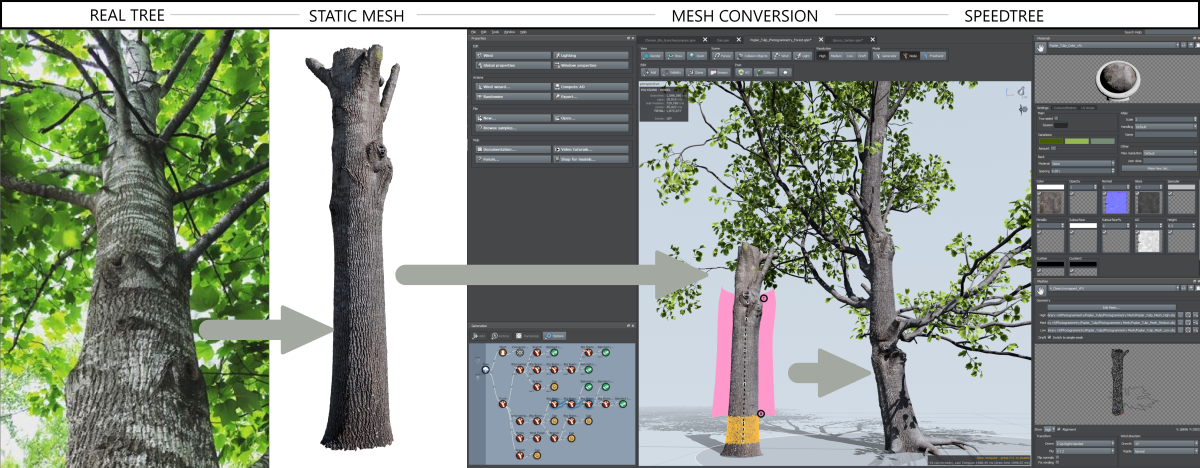
Step by step: Creating textures with the Mesh converter
- Use the material bar to bring in the unwrapped texture that goes with your mesh.
- Use the meshes bar to bring in a static mesh. (For our example we'll be using the most common type: a photogrammetry tree trunk.)
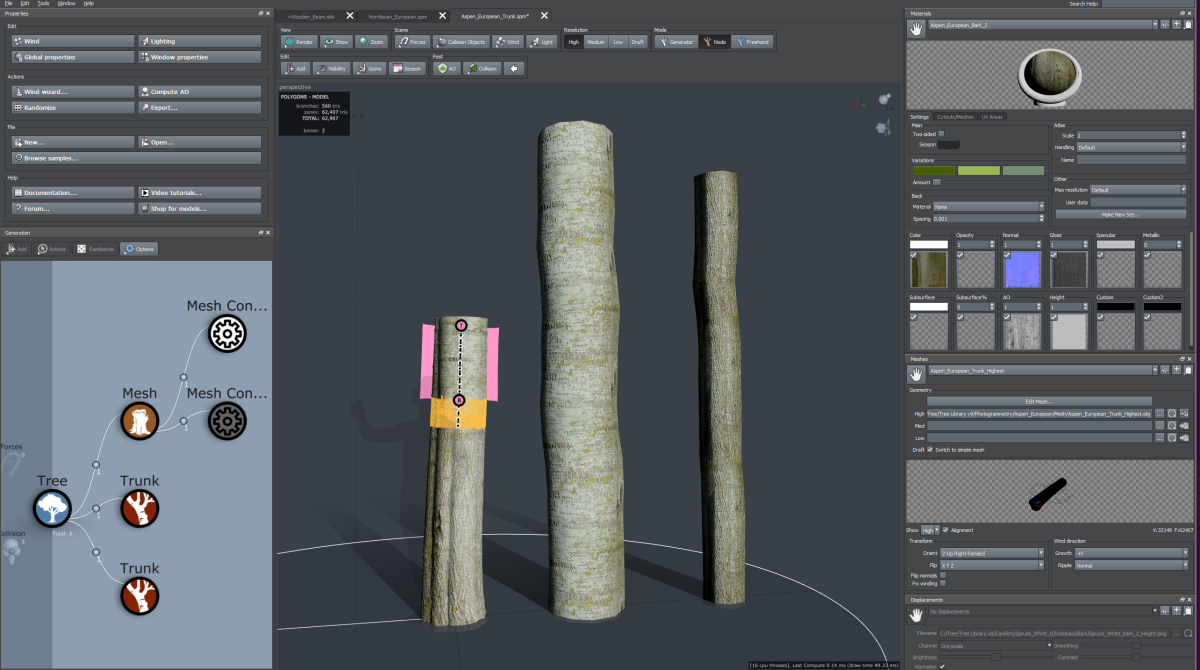
- Add a Mesh Generator to the tree node. Assign the material that goes along with the custom mesh.
- The Mesh converter can be added to the scene by loading it from templates.
- From the generation window, drag and drop the Mesh conversion Icon onto the desired Mesh. The Mesh converter is only valid attatched to a Mesh Generator or Branch Generator.
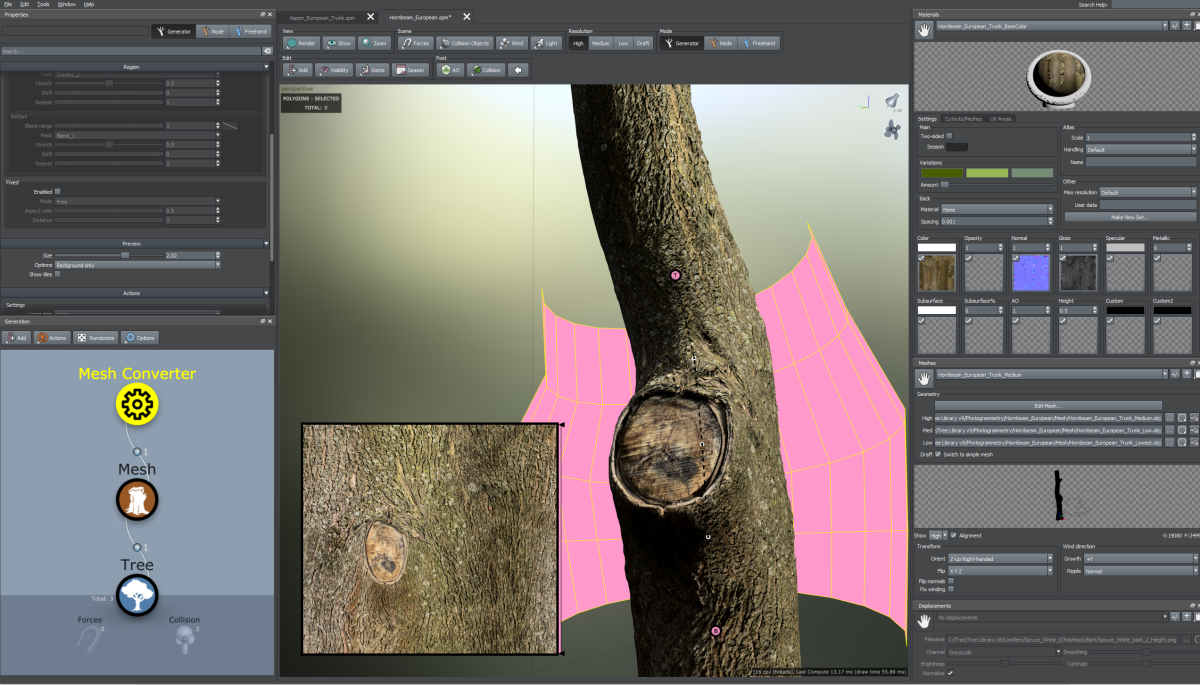
- The Mesh converter displays two dots: “T” for Top, “B” for Bottom. First, select the “Top” gizmo and hold the “T” button on your keyboard to place at the top of the trunk.
- Next, select the “Bottom” gizmo and hold the “T” button on your keyboard to place the at the bottom area of the trunk. Placing will automatically align and center, as best it can, with your mesh.
- Click the pink area marking your texture to enter the Mesh converter's properties.
- Adjust the properties to further align the spine to the mesh. Make sure all of the parts of the mesh are included by increasing the Clearance. Adjust the tiling regions blend area by looking at the preview texture displayed in the left of the tree window.
- When you are ready to export, you can select from the instant options at the bottom of your properties. For textures only, you'll be using:
Export maps...
Click this button to export a set of maps.
Make new material...
Click this button to export a set of maps and automatically create a material using them.
Note: You can purchase trunk meshes from the SpeedTree store, third parties, or you can scan and process your own. A good trunk or item to convert will have a fairly simple spine path and no overlapping vertices.
Workflows
Create a tileable texture
The most common workflow will be to create a tileable texture. Make sure the texture band at the bottom or top of the bark is on. Give your tree enough room to grab that texture and use the preview to adjust the blends. The blends can be viewed on their own as you select the blend map for the type of bark you are creating.
Example:
You've brought in a high poly photogrammetry trunk and you use the converter to take a bark from the lower trunk and one of the branches.
Create a non-tileable texture
Sometimes you may not need a texture to tile. You can skip the tileable band portion if that is the case. A good example of where you might use this method would be:
- You plan to stack or blend these bark textures in a different application.
- You're stealing a bark knot or small texture area to use in a cap.
- You don't care about blends and just want to stack textures in the upper canopy. See uv stacking workflow
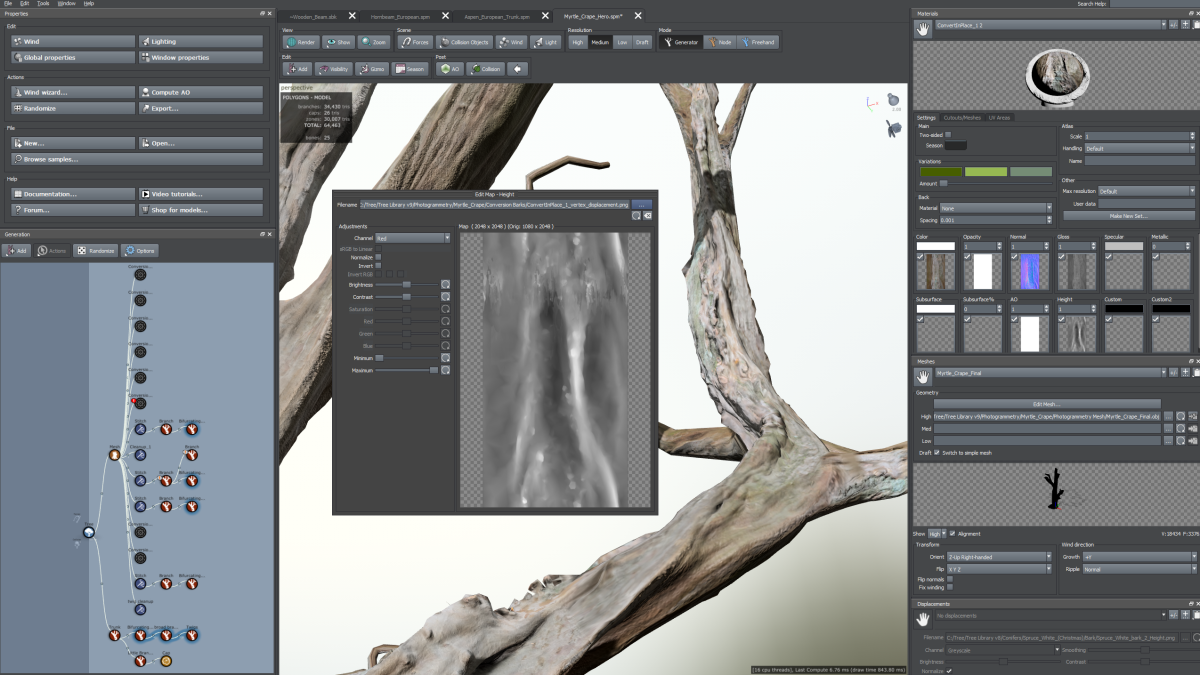
Create a heightmap based on the geometry of the original mesh
The Mesh converter will automatically do this for you without any extra steps. It will always send out the map if you are creating a texture. You can choose how you will be using this map if you'd like SpeedTree to automatically load it back into your file.
On the Mesh converter properties > Actions > Settings> Vertex height map:
- In the materials height channel: will send your texture to the material bar
- In a displacement asset: will send your texture to the displacement bar
When loaded, using branch properties > displacement with the proper texture selected will push out the unique bumps from the original scan.