meta data for this page
UV Area Editor
The UV Area Editor lets you cut out a piece of a texture or atlas and apply it to procedural geometry, such as a branch.
To open the UV Area Editor, load a file in the Materials Bar, then select UV Areas > Add. To edit an existing UV area, select its name. Click and drag the pivot points of the square in the preview, or enter the area numerically with the properties available.
If you instead need to create a mesh cutout for non-procedural geometry, use the Cutout Editor.
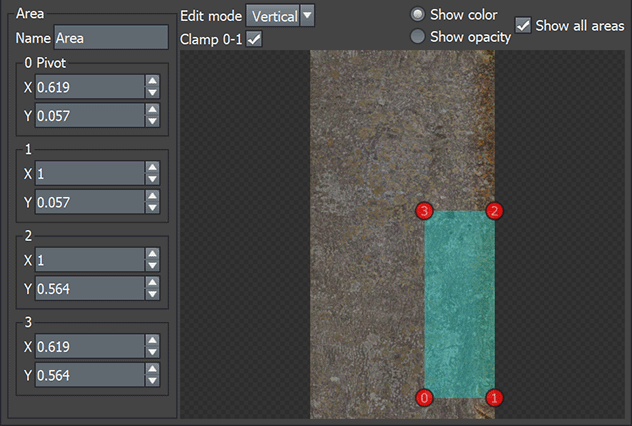
| Property | Description | ||
|---|---|---|---|
| Area | Set the name and location of the UV area. | ||
| Name | Specify the name of this atlas, which will show in various places in the GUI. | ||
| Pivot number 0-3 | Set the position of each pivot point. | ||
| X | The X coordinate of the pivot point. | ||
| Y | The Y coordinate of the pivot point. | ||
| Edit mode | Choose how manual adjustments affect the UV area. | ||
| Vertical | Maintain an axis-aligned box. | ||
| Box | Translate the whole area, with 0 as the pivot point. All other corners scale and rotate the area. | ||
| Free | Move all corners without restrictions. Use this mode to create non-rectangular shapes. | ||
| Clamp 0-1 | Corners won’t go outside the texture. This property is not available if Edit mode is set to Box. | ||
| Show color | Display the color channel of the material. | ||
| Show opacity | Display the opacity channel of the material. | ||
| Show all areas | If your material contains multiple UV areas, this option will draw them all in a different color so that you can see at a glance which parts of the material have / have not been used. | ||