meta data for this page
Vertex editing
Vertex Edit lets you move an individual vertex or a selected area of vertices. This tool is helpful for quick tweaks, fixing alignments, and rotating vertex normals.
Note: Vertex edits can be lost if you change the model’s resolution; use this tool at the very end of your modeling workflow.
How to edit a vertex
Follow these steps to get started with bending.
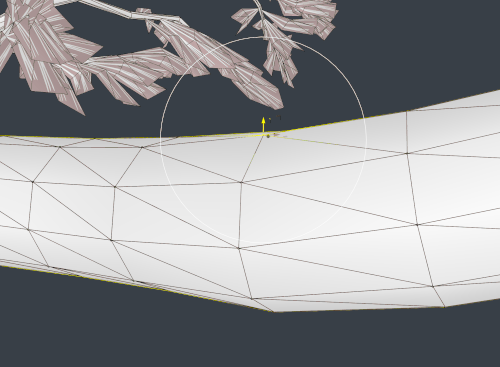
- In Freehand Mode, select the node you are working on, then Vertex Edit. The Vertex Edit brush will appear on your tree.


- You can check “Soft-Selection” in the Properties Window to affect the selected vertex and its neighbors simultaneously. Hold “Space” + scroll your mouse wheel to resize the selection area (the white circle).
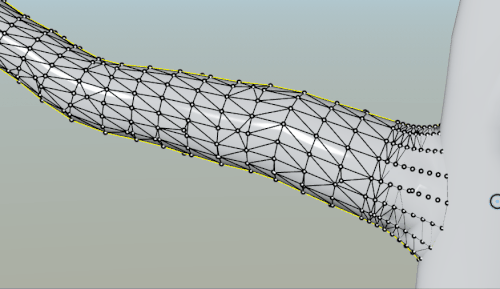
- You can use Vertex Edit with the Transform Gizmo in Translate (hotkey W) or Rotate (hotkey E). Use hotkey Q to toggle between Global and Local space. Translate will move the vertex position and Rotate will move the vertex normals (hotkey N to view Normals).
- Left-click + drag to move the vertex. You can see the selected vertex’s values in the properties window.
Vertex edit properties

Soft-selection
Allows you to edit a single vertex (unchecked) or the selected vertex and its neighbors simultaneously (checked). The area of selection is represented by the white circle.
S-curve vs. linear vs. sharp vs. round vs. constant
Use the combo box to select a falloff curve shape.
Branch vs. blend
This combo box is where you choose which skin to edit. For example, Branch will highlight the vertices on the main portion of the node, and Blend will highlight the area connecting two nodes.
Clear selected
Clear edits from the selected vertex.
Clear all
Clear all vertex edits.
Vertex data box
View the vertex data, including position, color, normals, and ambient occlusion.