meta data for this page
This is an old revision of the document!
Mesh Converter
What is it?
The mesh converter is a generator introduced with version 9 that can be placed off an imported mesh.
Unlike any of the other generators, the converter is a tool that can harness the textures and shape from an imported mesh and place them back
in the scene in a more usable way. The mesh converter makes it possible to fully optimize your tree’s parts while maintaining its unique geometry and texturing.
Note This tool is for predominantly tree trunk photogrammetry bases and will work best with tube-shaped meshes. If there is a branch off the trunk, the converter cannot be placed and will need to be in a good position.
Why use it?
Static mesh imports are somewhat limited in how you can blend and use them: you’re locked into that one scanned mesh's look. By converting the scan, you can harness key components (shape, texture), reuse, and recycle from the base. This makes adding new procedural branches faster. SpeedTree branches are far more capable than scanned branches, and this tool frees you from the singular static mesh's appearance.
What can I do with it?
Create Textures
Step by Step: Create textures
- Create a tileable texture from the original mesh
- Create a height map based on the geometry of the original mesh
- Create a non-tileable texture (ex. Knots)
Convert to SpeedTree Nodes
Step by Step: Convert to SpeedTree Nodes
- Convert in Place: automatically stitch an extension from the end of your mesh. This creates a stitch, keeps the base mesh, and connects it to a SpeedTree branch node.
- Convert to Trunk: creates a new SpeedTree branch node with the new tileable texture and height map. In this scenario, the original mesh is not used in the final tree.
- Convert to Branch: creates a new Speed Tree branch node coming off of the original mesh, attached by a spine-only node. The new branch uses the newly created tileable texture.
Using the Mesh Converter
How to Place the Converter
- The mesh converter can be added to the scene by loading it from templates.
- From the generation window, drag and drop the Mesh Conversion Icon onto the desired Mesh. The Mesh converter is only valid if attached to a Mesh Generator or Branch Generator.
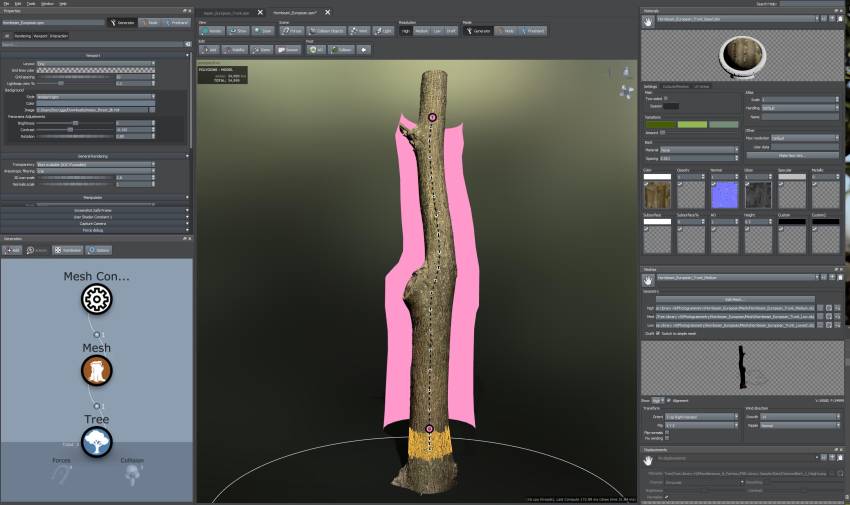
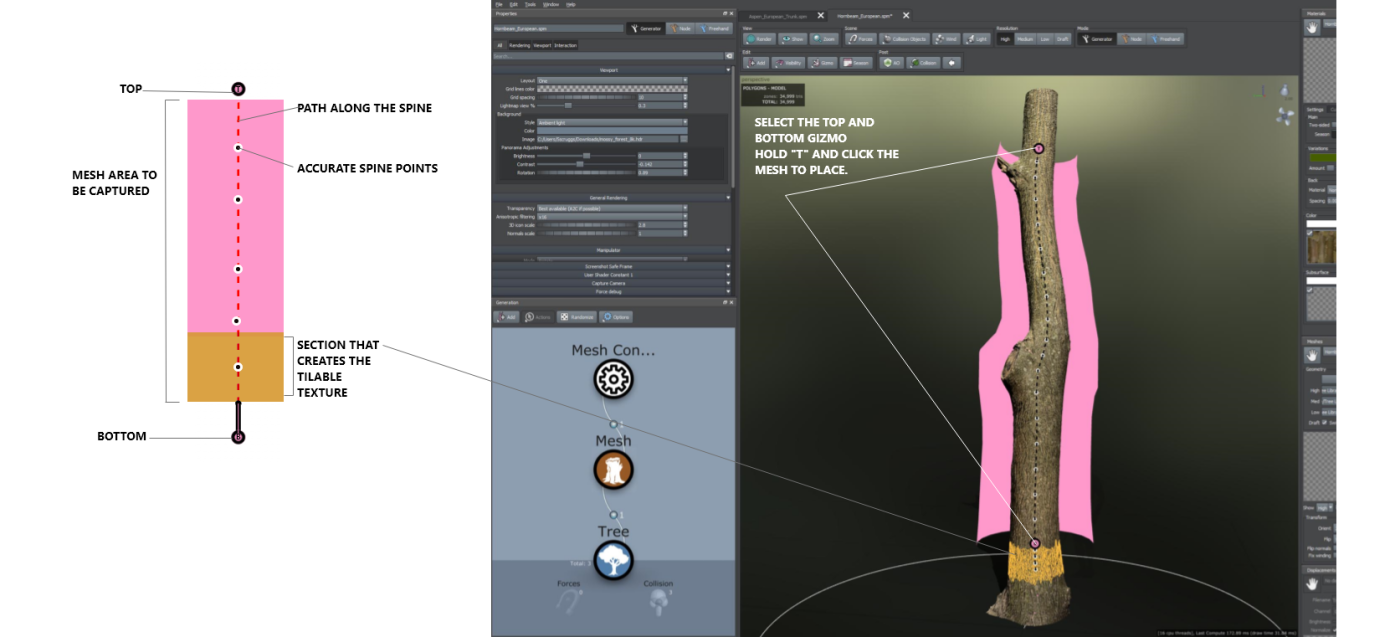
- The Mesh Converter displays two dots: “T” for Top, “B” for Bottom. First, select the “Top” gizmo and hold the “T” button on your keyboard to place the Top at the top of the trunk.
- Next, select the “Bottom” gizmo and hold the “T” button on your keyboard to place the Bottom area of the trunk. Placing will auto align and center, as best it can, with your mesh.
- Click the pink area marking your texture to enter the Mesh Converter's properties.
- Adjust the properties to further align the spine to the mesh. Make sure all of the parts of the mesh are included by increasing the Clearance. Adjust the tiling region's blend area by looking at the preview texture displayed in the left of the tree window.
- Convert by using the five automatic buttons at the bottom of the converter's properties. See Convert to Texture and Convert in Place.
For more help see our tutorial videos to follow along.